Friday, 20 January 2017

Disable Android Apps Running In Background

All you need to do right now is open Developer settings on your device and then:
Make sure that Developer options are ON. Use the toggle to turn it on and click OK once you see the warning.


This is the warning you have to accept by clicking OK.


Swipe down until you see Applications. The location of Applications may differ depending on the device and the version of Android.


These are developer options on my device. Applications are on the bottom.


There are two options that should interest you: Do not keep activities and Limit background processes.
If you want to disable apps and processes from running in the background make sure that Do not keep activities is turned ON and Limit background processes is set to No background processes. Take a look at the screenshot below.


This is how you can easily disable background apps on Android.


Congratulations! You have successfully disabled background apps on Android. Your device battery life should improve a little bit.

However, it may take a bit longer for your phone to open apps (as it has to open each app every time you have to use it instead of returning to it).

This setting may also impact the correct operation of some apps (e.g. alarm clock apps) so be sure that you know what you are doing by disabling background apps on your Android device. Good luck!

iPhone or iPad Camera Not Working

If you face the problem with iPhone camera where you see a black screen when you open your camera app, the first thing you need to do is to check out whether it's a software or hardware issue. Start a Facetime call to one of your friends. Check both the background and front iPhone cameras. If it is the hardware problem, you should contact Apple; if it's software issue you can fix with the potential solutions here.


iPhone iPad Problems – Camera Not Working

Double press the Home button quickly will reveal all running apps in the multitasking manager, scroll right across the icons to find camera, swipe the screen to close Camera app. Open it again to see if it working.

Press and hold the Power buttons simultaneously and wait Apple logo to appear. Let go both buttons to reboot your iPhone. Check Camera app after that.

Go to Settings > General > Reset > Reset All Settings. This won't delete any files or photos.

iPhone Red Screen/Blue Screen

Common iPhone iPad Problems – Red/Blue Screen

A lot of iPhone users get stuck on red or blue screen like the above user, and many of them are complaining about it in Apple Support Communities.


Hard Reset Your iPhone: Press and hold down the Sleep/Wake button and the Home button simultaneously for 10 seconds until you see the Apple logo.

Restore Your iPhone: Press and hold down the Sleep/Wake button to turn off your iPhone. Connect your iPhone to computer via a USB and make sure that your computer is running the latest version of iTunes. Hold down the Sleep/Wake and Home buttons for a few seconds, when the device turns on let go the Sleep/Wake button, but keep holding down the Home button. In the Connect to iTunes screen, you can let go of the Home button. Follow the restore procedure through iTunes.

iPhone, iPad, or iPod touch won‘t turn on


Your device might have a frozen screen that doesn’t respond when you touch it or press buttons. Or maybe your device begins to turn on, but gets stuck during startup. These steps can help.

If your screen is black or frozen

First, try to force your device to restart.
Forcing your device to restart won't erase the content currently on your device.
You can force your device to restart even if your screen is black or your buttons aren't responding.

To force restart an iPhone 7 or iPhone 7 Plus: Press and hold both the Sleep/Wake and Volume Down buttons for at least ten seconds, until you see the Apple logo.

To force restart an iPhone 6s and earlier, iPad, or iPod touch: Press and hold both the Sleep/Wake and Home buttons for at least ten seconds, until you see the Apple logo.

If your device still won't turn on or start up

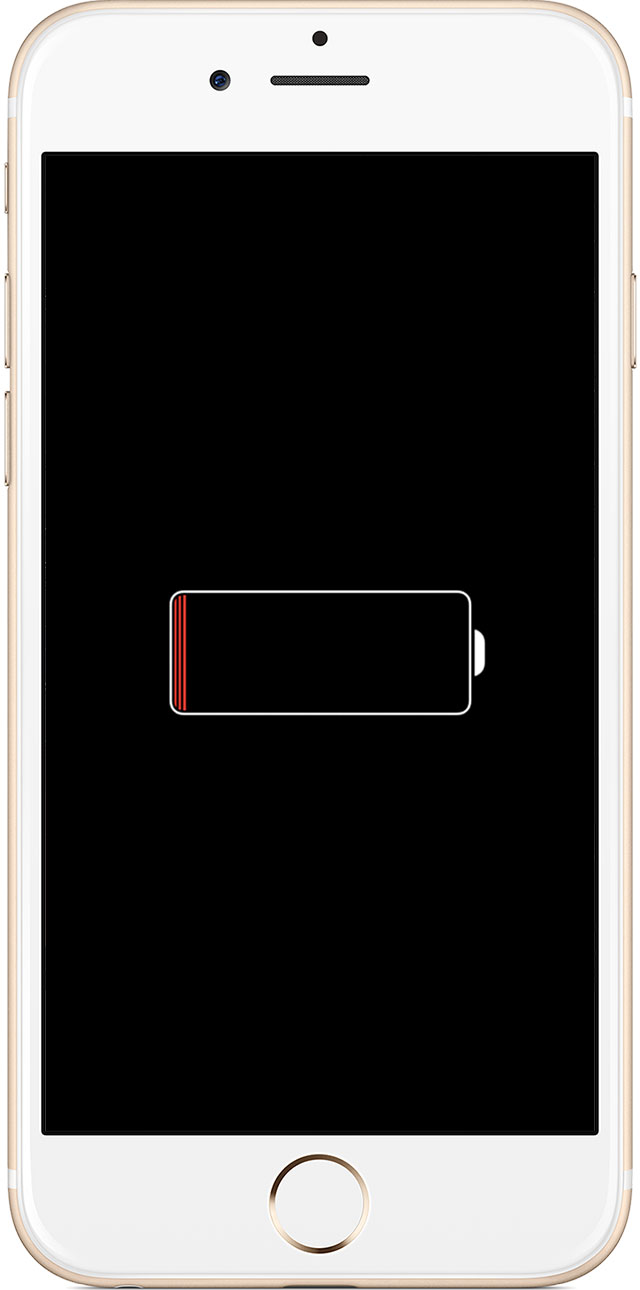
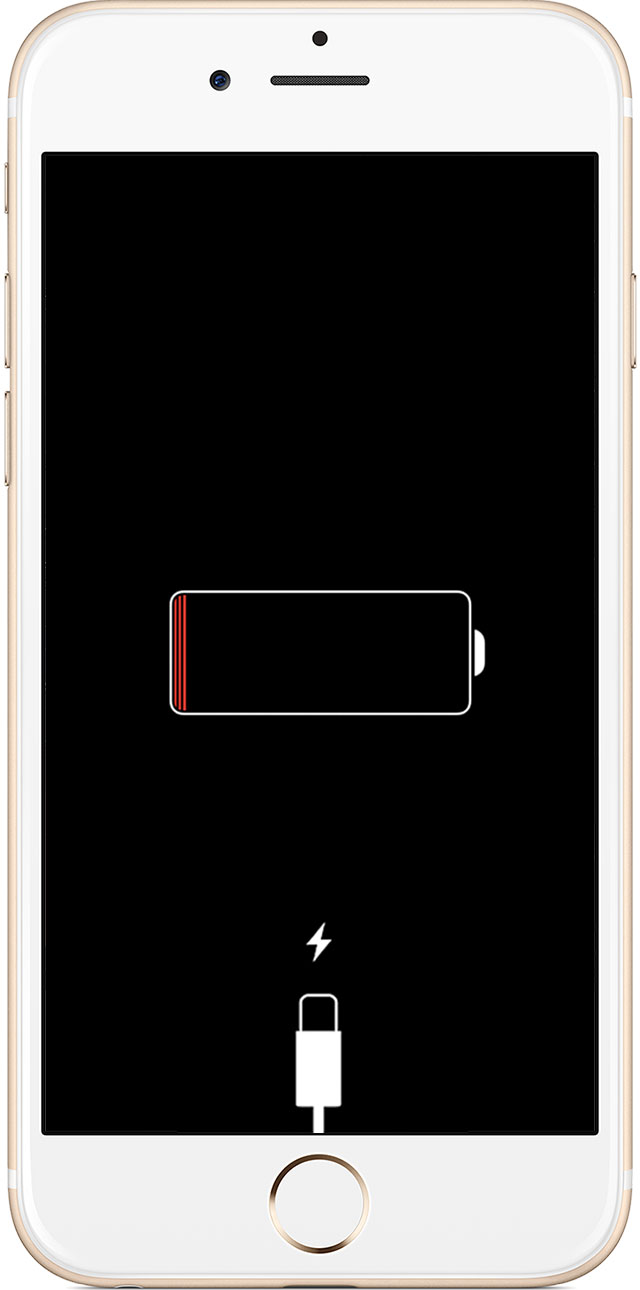
Plug in your device and let it charge for up to one hour.


After a few minutes, you should see the charging screen.


If you don't see the charging screen within an hour, or you see the connect to power screen, check the jack, USB cable, and power adapter. Make sure that everything is plugged in firmly, free of debris, and not damaged. You might want to try a different USB cable or power adapter.

If your device turns on but gets stuck during start up

You might see the Apple logo or a red or blue screen for a long time during startup. Try these steps:
Connect your device to a computer and open iTunes. If you don't have a computer, you can borrow one, or go to an Apple Retail Store or Apple Authorized Service Provider for help.
While your device is connected, force it to restart.
On an iPhone 7 or iPhone 7 Plus: Press and hold the Sleep/Wake and Volume Down buttons at the same time.
On an iPhone 6s and earlier, iPad, or iPod touch: Press and hold the Sleep/Wake and Home buttons at the same time.
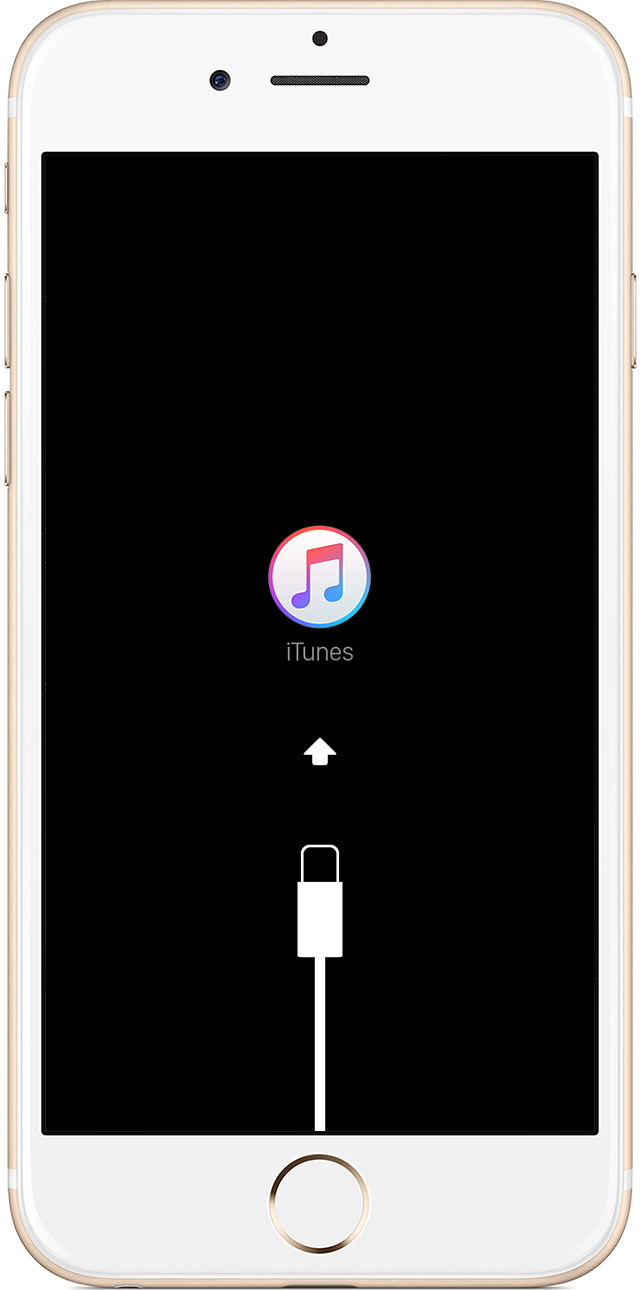
Don't release when you see the Apple logo. Keep holding until you see the recovery mode screen.

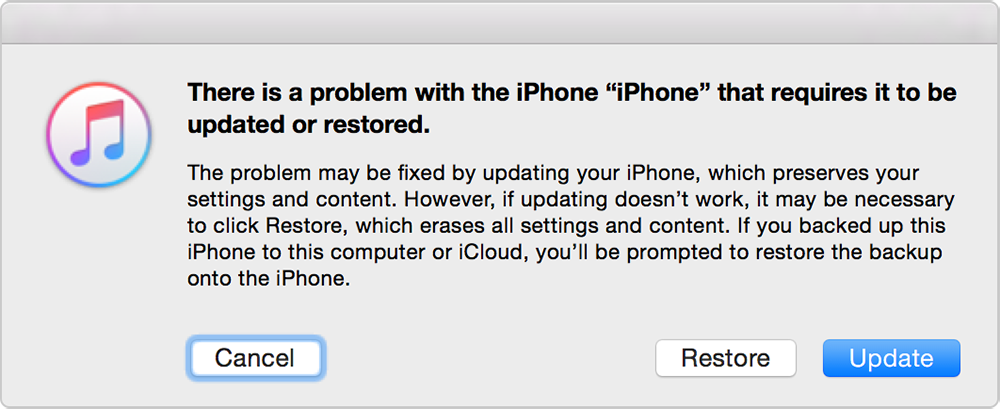
When you get the option to restore or update, choose Update. iTunes will try to reinstall iOS without erasing your data.


iTunes will download the software for your device.

Cleanup your Mac

Spilling liquids on your Mac is a nightmare scenario. With a laptop, grab it quickly being wary of any non-MagSafe cables and turn it upside down, allowing as much liquid as possible to run off; then shut it down and leave it in a warm (not hot) and dry place to recover.

Clean off any residue with a cotton bud slightly dampened with water. With desktop Macs it's usually the keyboard that gets it. Unplug, turn upside down, then assess the damage.

If the liquid has gone right inside and is something that won't easily evaporate away, like a fizzy drink or beer, consider running the whole thing under the tap; this shouldn't cause permanent damage as long as you dry it out fully, leaving it somewhere warmish for a day or so, before reconnecting.

This is, of course, entirely at your own risk. On a less mission-critical theme, white MacBooks can get grubby quickly. A clean cloth lightly dampened with plain water is safe to use.

Thursday, 19 January 2017

How to Disable extensions on boot

Symptoms: 
Apple computer does not boot or start up to the desktop.

Causes:
When extensions prevent a computer from booting, it's frequently due to an application that was installed or a login app that's causing the lockup.

Solution:
Power on or restart the computer while holding down the [shift] key. Continue to hold down the key to disable extensions and login items from loading during the boot process. From a desktop with extensions disabled, "safe mode" will allow the end user to remove the offending app and boot normally.

How to Clear the PRAM

Symptoms: 

Boot issues, such as slow to start or halted startup.

Causes:  
PRAM is non-volatile memory used by the Apple computers to store configuration information. However, certain changes might remain stagnant in residual memory which can lead to bizarre behavior(s).

Solution: 
Power off your computer. Then power the device on while simultaneously holding down the [command]+[option]+[P]+[R] keys. You should hear the Apple chime before the computer reboots. Continue holding the keys down until you hear the second Apple chime to clear the PRAM.

Mac won’t shut down

So, you’ve tried to shut down your Mac but nothing is happening. The first thing you should do is give it time, as OS X has to sort through all its open files and close all programs before it can safely shut down. If, after around five minutes, you’re still staring at the same screen, something hasn’t gone to plan and its time to take action. Take a look at the Dock, and make sure there are no bouncing app alerts or open apps that could interrupt the shut down process. It may be a word processing app that’s stopping the shut down before you save your documents.

It’s also worth checking to see if there are any frozen applications open, as frozen apps can stop a Mac from shutting down, and manually closing them may speed up the shut down process. Identify any open or frozen apps in the Dock and either Quit or Force Quit them before trying to shut your computer down again.

As a last resort, you can force your Mac to shut down, but doing so may cause issues with file corruption, as mentioned earlier. To manually shut your Mac down, press and hold the power button on the back of the Mac until your screen goes black and the system shuts down. It’s worth noting that this should be done once in a blue moon, and if you find yourself doing this regularly, it may be worth reinstalling OS X

How to make your Mac connect to the most reliable Wifi Network

Do you have a couple of wifi options but your mac system keeps connecting to a slow network from the list of wifi.

Simply identify the 5GHz and tell your Mac to join the 5GHz network in preference rather than the 2.4GHz network

To do this, go to System Preferences > Network > Wi-Fi > Advanced. From the Advanced Wi-Fi Settings menu, simply identify your 5GHz network and drag it to the top of the list.

You’ve now told your Mac to join the 5GHz network whenever possible, leaving more room on the 2.4GHz frequency for devices that need it, whilst at the same time providing you with a more reliable and speedy Wi-Fi connection.

Constant “Security” Warnings While Browsing

While this may be one of the most annoying problems, it’s also incredibly easy to fix. Check that your computer’s clock shows the correct time and date. If it doesn’t, right-click on the clock and select “Change date and time settings” to correct it manually.

File opens with wrong program

If a particular type of file no longer opens in the correct program, right-click the file in question and then simply select Open with > Choose Program.

Select your chosen program from the list (click Browse if it's missing), and make sure "Always use the selected program..." is ticked. Then click OK; this will save your preference whenever you open files of that type.

Create a repair disc

If your PC didn't come with a Windows installation disc, click Start, type "backup" and click Backup and Restore.

Select "Create a system repair disc" and put a blank CD or DVD in your writable drive to create a bootable disc with the "Repair your computer" options on it.

No Sound/Audio in Windows

 Before running the Microsoft Fix It Center tool (see tip three), open the "Sound" or "Sounds and Audio Devices" Control Panel.

Select the Playback or Audio tab, and verify the device is set to be the default; if not, select it from the list to fix the problem.

Fix low memory Error

Fix this problem by making sure Windows is set to handle your virtual memory settings; open the System Control Panel and either click "Advanced system settings" or switch to the Advanced tab.

Then under Performance click Settings, select Advanced and click Change. You need to verify that "Automatically manage paging file for all drives" is selected, then if necessary click Set > OK, reboot when prompted.

Resolve File sharing problem

Verify your PCs are on the same network – wireless or wired – and all on the same workgroup (click Start, right-click Computer and select Properties; Is File and Printer Sharing enabled?


Check from the Network and Sharing Center in Vista/Windows 7 – ensure your network is Home or Work. In Windows 7 click Choose homegroup and sharing options > Change advanced sharing settings. 

You can also access it by right clicking the network icon at the bottom right of your computer and select Open network and sharing center. then select Change Advanced sharing settings

Fix Windows driver problems

Most hardware problems can be traced to the drivers, the software that enables them to work with Windows. When it comes to tracking down problems, the first port of call should be Windows' own Device Manager – here's how to troubleshoot problems using this useful tool.

Right click on your pc icon or My computer icon and select manage. On the left pane, click Device manager.
The hardware with driver problem will have a yellow triangle on them.

 Look for yellow exclamation marks next to troublesome hardware devices and double-click one


Look on the General tab for an error code and description of the problem – if a troubleshoot button is present, click it to see if you can fi x the problem easily.

If no fix is forthcoming, use the error details as part of your web search – try a general search first, then add your hardware's make and model if necessary.

System Restore not working

If you're having problems restoring your computer to an earlier state, try booting into Safe Mode (tap [F8] as your PC restarts) and running System Restore from there.

In Windows 7 there's also another option: you can also run the tool directly from your Windows disc if you can't access Windows.

PC keeps rebooting after Windows Update

If your PC gets stuck in a cycle of rebooting during the update process, you need to undo the updates using System Restore. If your computer came without a Windows disc, look for an option to access recovery options, or tap [F8] before Windows starts loading, and then choose "Repair your computer".

If you have an installation disc, boot from it, select your language and then choose "Repair your computer". In both cases, when the menu appears, choose System Restore to undo the update.

Remove printer drivers

To ensure all traces of an old printer are removed from your PC, open Printers or Printers and Faxes. Right-click blank space in the Printers Control Panel or Run as Administrator > Server Properties > Continue.

Switch to the Driver tab – if your driver is still present, select it and click Remove. If you're using Vista you should leave "Remove driver only" selected only if the drivers were provided by Windows. Click OK followed by Yes > Close.

Windows Computer failed to sleep

If your PC won't stay asleep it's often because a device is configured to bring it out of standby when triggered. Identify the culprit by pressing the Windows key and [R], type "cmd" and press [Enter].


Type the following line and press [Enter]: powercfg –devicequery wake_armed
Now press the Windows key and [R] again, but this time type "devmgmt.msc" to open Device Manager. Find any devices listed earlier, then double-click them and look for an Advanced or Power Management tab.

Check if the device is allowed to bring the PC out of standby – if it is, untick all the boxes that wake it. Click OK, close Device Manager and test it worked

Monday, 16 January 2017

How To Change Windows Update Settings in Windows 10

  1. Tap or click on the Start button from the Windows 10 desktop. 
  2. Choose Settings to open System Settings. 
  3. Tap or click Update and security from the Settings window. 
  4. Choose Window Update from the menu on the left, assuming it's not already selected. 
  5. Tap or click on the Advanced options link on the right. This will open a window with a Choose how updates are installed heading. 
  6. The various settings on this page control how Windows 10 will download and install updates from Microsoft.
  7. Changes to Windows Update settings in Windows 10 are saved immediately once you make them. Once you're done, feel free to close the Advanced Options window that's open.

Spotlight not working on Mac

  • Spotlight sometimes has trouble indexing after upgrade of Mac Os to El Capitan, which means it will only search a limited number of databases and will often bring up no answer for very common queries. The good news is this typically only happens once, while Apple restores the indexing process.
  • If it keeps on underperforming, visit System Preferences, go to Spotlight, and look for indexing options under Search Results. Here you can see control what Spotlight is searching and what it isn’t. Make sure that the proper indexes are selected for your searching needs

iTunes not working on Mac

  • Has iTunes stopped responding for you? Is it taking a ridiculously long time to locate and play music? Are you left unable to click on anything? There are some hints that this may be connected to an iCloud issue, so you should try disabling iCloud and see if this improves. Head over to System Preferences and select iCloud. Try un-checking iTunes-related features and apps in iCloud. If this doesn’t work, try using “Sign Out” to disable iCloud entirely and see if this helps.
  • If this doesn’t solve the problem, be patient and check for the latest iTunes updates from Apple for a performance fix. You will receive notifications about iTunes updates, or you can check manually by going to the iTunes Menu and selecting Check for Updates.

Documents not printing properly on Mac

  • Visit Printers & Scanners in System Preferences, find your printer icon, and right click on the icon to find the Reset Printing System
  • It’s a good idea to also reset your Mac completely after resetting your printer so everyone gets a fresh start. Visit the Apple Menu (the button in the top left of your screen with the apple logo), and select the option Restart. Sometimes if Yosemite has really hit a wall this will freeze your computer instead of restarting it. If this happens, press Control key-Command key (⌘) -Power button at the same time. This will force the restart – just be sure that your programs are closed and your data saved before you attempt this.

Battery drains quickly after upgrading Macbook to EL capitan

If you noticed your battery life has diminished since upgrading your mac book to el capitan. It is very possible that the OS has changed your battery mode to high performance or some apps are responsible.

1. Visit System Preferences, go to Energy Saver, and make sure that your sleep mode settings are just how you prefer them. Pay special attention to the apps that require your Mac to be awake. Switch off “required” apps that may be keeping your Mac running at odd times. You should also try quitting out of iTunes, your printer, and any running third party apps.

2. Check your Wi-Fi settings and your apps to make sure that no apps are stuck in a permanent download state. If they are, delete and reload them via the Update section of the App Store.

3. If your settings and startup seem especially sluggish or a bit noisy, you can try resetting your PRAM. Go to the Apple Menu and use Shut Down to turn off your computer. Turn your Mac back on, and as it starts up hold down the Option-Command-P-R keys before the logo screen can appear. Hold these keys until your computer automatically reboots. This will restore startup functions to factory settings and may help your problem.


Email is not working since upgrade to El Capitan or Yosemite

  • If your email client has stopped functioning and brings up error messages instead of sending messages, there may be something wrong with your email settings after the upgrade to Yosemite or El capitan 
  • Visit Mail, go to the Preferences tab, and select Accounts. Under the account that seems to be giving you problems, select Account Information, and review the servers used for outgoing messages. Use the proper SMTP Server information according to your latest Internet provider information.
  • Much like Safari, Mail may be using extensions that causes the issue. Go to the Mail Menu, go to Preferences, and select Extensions. Uncheck all your extensions and relaunch to see if that fixes the problem. If it does, check through your extensions to find out which ones are causing trouble.

Bluetooth has stopped working on Mac

  • Start by double check that your Bluetooth is turned on via the Bluetooth icon on the upper right part of your screen, next to Wi-Fi and Time Machine.
  • Shutting down your Mac completely. Visit the Apple Menu and select Shut Down to get started. Disconnect all your accessories that need dongles or cables.
  • Now restart your Mac and slowly attach accessories – Bluetooth and otherwise – checking to make sure the connections work each time. If your Bluetooth works as expected for a device, then one of your accessories may be causing problems. Find the problematic device and replace it if possible.
  • If this doesn’t work, try alternative Bluetooth devices to see if they function – it could be an issue with older accessories or similar problems.

Microsoft Office keeps crashing on mac with EL Capitan OS or Yosemite

  • El Capitan included a lot of performance enhancements for OS X, it had some negative effect on Microsoft Office, especially when it comes to email with outlook. So if Outlook keeps on quitting unexpectedly or if you find that Word is crashing ever since the update, you must have probably run into one of the Microsoft Office bugs.
  • Apple has released an update, OS X 10.11.1, designed to take care of many of these Office problems. Navigate to the Apple Menu, and click on Software Update… to see if any updates need to be downloaded.
  • You can also restart completely to enact any waiting updates. Visit the Apple Menu (the button in the top left of your screen with the apple logo), and select the option Restart. Sometimes if Yosemite has really hit a wall this will freeze your computer instead of restarting it. If this happens, press Control key-Command key (⌘) -Power button at the same time. This will force the restart – just be sure that your programs are closed and your data saved before you attempt this. This should download any waiting updates on your computer.
  • Try downloading updates directly from Microsoft if any are available. Visit the Help Menu for any Office for Mac program, and click on Check for Updates – the program should do the rest.

An App stopped working since El Capitan

  • If you have a favorite app that is no longer functioning on the newest version of Yosemite or is so slow that you can’t even use it anymore you can usually restore functionality with a few simple steps. Check in the App Store to see if that app has any recent updates to improve its relations with El Capitan. This will be shown via App Store updates, and you can choose to update all apps at once if necessary. When finished, go to the Apple Menu and select Restart to reboot your computer and see if the app works again.
  • You can also check to see if your app is using any plugins or extensions (looking at you, Safari and Mail). For most apps, like Safari, you can go to the Menu button, select Preferences, and click Extensions if the app uses extensions. This will bring up a list of Extensions that can be checked on or off. Try disabling all of them and see if that improves matters, then narrow it down to the exact plugins that are causing the problem. Try this with any Apple app is giving you trouble.
  • Try deleting the app completely, then re-downloading it again from the App Store. Sometimes this can help solve bugs and other issues.

Windows update installation stuck?


  1. Press Ctrl-Alt-Del In some situations, the Windows update(s) may be hung at a very particular part of the installation process and you could be presented with your Windows login screen after executing the Ctrl-Alt-Del keyboard command. If so, log on as you normally would and let the updates continue to install successfully.
  2. Restart your computer, using either the reset button or by powering it off and then back on using the power button. Hopefully, Windows will start normally and finish installing the updates. If you're using Windows 10 or Windows 8, and you're taken to the sign-in screen after the restart, try tapping or clicking the power icon on the bottom-right and choosing Update and Restart, if available.
  3. If you're automatically taken to the Advanced Boot Options or Startup Settings menu after restarting, choose Safe Mode and start Windows in Safe Mode. This special diagnostic mode of Windows only loads the minimum drivers and services that Windows absolutely needs so if another program or service is conflicting with one of the Windows updates, the install might finish up just fine.If the Windows updates do install successfully and you continue to Safe Mode, just restart from there to enter Windows normally. 
  4. Complete a System Restore to undo the changes made so far by the incomplete installation of the Windows updates. Since you can't access Windows normally, try doing this from Safe Mode. See the link in Step 3 if you're not sure how to start in Safe Mode. During the System Restore, be sure to choose the restore point created by Windows just prior to the update installation.Assuming a restore point was made and System Restore is successful, your computer should be returned to the state it was in before the updates started. If this problem occurred after automatic updating, like what happens on Patch Tuesday, be sure to change Windows Update settings so this problem doesn't reoccur on its own. 
  5. Try System Restore from Advanced Startup Options (Windows 10 & 8) or System Recovery Options (Windows 7 & Vista) if you're not able to access Safe Mode or if the restore failed from Safe Mode. Since these menus of tools are available from "outside" of Windows, you can try this even if Windows is completely unavailable.Important: System Restore is only available from outside of Windows if you're using Windows 10, Windows 8, Windows 7, or Windows Vista. This option is not available in Windows XP. 
  6. Start your computer's "automatic" repair process. While a System Restore is a more direct way of undoing changes, in this case a Windows update, sometimes a more comprehensive repair process is in order.In Windows 10 and Windows 8, try a Startup Repair. If that doesn't do the trick, try the Reset This PC process (the non-destructive option, of course).In Windows 7 and Windows Vista, try the Startup Repair process.In Windows XP, try the Repair Install process. 
  7. Test your computer's memory. It's possible that failing RAM could be causing the patch installations to freeze. Fortunately memory is really easy to test. 
  8. Update BIOS. An outdated BIOS isn't a common cause for this problem, but it's possible.If one or more of the updates Windows is trying to install is involved with how Windows works with your motherboard or other built-in hardware, a BIOS update could solve the issue. 
  9. Clean install Windows. A clean install involves completely erasing the hard drive that Windows is installed on and then installing Windows again from scratch on that same drive.

How To Use System Restore in Windows 10, 8, or 8.1


  1. Open Control Panel. Check out that linked how-to if this is your first time, or just search for it from the Windows 10 Cortana/Search box or the Windows 8/8.1 Charms Bar.
  2. Tap or click on System and Security within Control Panel.
  3. In the System and Security window that's now open, click or tap System.
  4. On the left, click or tap the System protection link.
  5. From the System Properties window that appears, tap or click the System Restore... button. If you don't see it, make sure you're on the System Protection tab.
  6. Tap or click Next > from the System Restore window titled Restore system files and settings. If you've previously performed a System Restore, you may see both an Undo System Restore option, as well as a Choose a different restore point option. If so, select Choose a different restore point, assuming you're not here to undo one.
  7. Select the restore point you want to use from those in the list. If you'd like to see older restore points, check the Show more restore points checkbox. All restore points that are still in Windows will be listed here, so long as that checkbox is checked. Unfortunately, there is no way to "restore" older restore points. The oldest restore point listed is the furthest back you can possibly restore Windows to.
  8. With your chosen restore point selected, tap or click the Next > button.
  9. Confirm the restore point you want to use on the Confirm your restore point window and then tap or click the Finish button. If you're curious as to what programs, drivers, and other parts of Windows 10/8/8.1 this System Restore will impact on your computer, select the Scan for affected programs link on this page prior to starting the System Restore. The report is informational only, but might be helpful in your troubleshooting if this System Restore doesn't fix whatever problem you're trying to solve.
  10. Tap or click Yes to the Once started, System Restore cannot be interrupted. Do you want to continue? question. If you're running System Restore from Safe Mode, please know that the changes it makes to your computer will not be reversible. Don't let this scare you away - chances are, if you're doing a System Restore from here, it's because Windows isn't starting properly, leaving you with few other options. Still, it's something you should be aware of. Your computer will restart as part of a System Restore, so be sure to close anything you might have running right now.
  11. System Restore will now begin reverting Windows to the state it was in at the date and time logged with the restore point that you chose in Step 7. You'll see a small System Restore window that says Preparing to restore your system..., after which Windows will almost completely shut down.
  12. Next, on a mostly empty screen, you'll see a Please wait while your Windows files and settings are being restored message. You'll also see various messages appear underneath, like System Restore is initializing..., System Restore is restoring the registry..., and System Restore is removing temporary files.... All in all, this will probably take around 15 minutes. What you're sitting through here is the actual System Restore process. Do not turn off or restart your computer during this time!
  13. Wait while your computer restarts.
  14. Sign in to Windows as you normally do. If you don't use the Desktop and aren't switched there automatically, go there next.
  15. On the Desktop, you should see a small System Restore window that says "System Restore completed successfully. The system has been restored to [date time]. Your documents have not been affected.".
  16. Tap or click the Close button.
  17. Now that the System Restore is complete, check to see that whatever issue you were trying to fix is actually corrected.

Wifi is very slow with El capitan

  • After upgrading to EL capitan, you may have found that your Wi-Fi is very slow. El Capitan may be struggling with your Wi-Fi settings. Apple has released updates to try and improve this problem, so first check for any updates to OS X and see if you can download a solution. Go to the Apple menu, and select Software Update… to see if there are any currently released updates for your system (Yosemite will also remind you about this via alerts).
  • If this doesn’t work, check your router. Check to see if your router needs any firmware updates and download them if available. Visit your router manufacturer website to look for firmware and follow the instructions on their sit.
  • Reboot your router to see if this solves the problem. Unplug your router completely or use your router reset button for this. Leave the router off for about 30 seconds before restarting it.
  • If it does not work, try deleting your old router settings and setting up a new network via El Capitan. Visit your System Preferences, go to Network, select Advanced, and under the Wi-Fi tab delete your preferred networks, turn your Wi-Fi off, then turn it back on again. Set up a new connection to see if this helps.
  • It is also possible for your Wi-Fi to be experiencing interference. If you have a dual-band router, set it to the 5GHz band on your computer to see if this helps.

Forgotten password on Mac

The great thing about password protected user accounts is that other people can't get at your stuff. But if you forget the password, you can't get at it either.

However, if your Mac starts up with a login request and you've forgotten it, all you need is the OS X DVD that came with the computer. Insert and restart, holding the C key to make sure your Mac boots from the DVD.

You'll find a Utilities menu that includes the command Reset Password. Do it, then restart, holding down the left mouse-button.

If you used FileVault (in the Security pane of System Preferences) to encrypt your home folder, the procedure is different. To override your FileVault password you need your master password.

Mac System acting Funny and Slow

Sometimes you just can't point in the right direction but your Mac system isn't what it use to be in terms of response and reliability. Verily, Maintenance is needed as soon as possible.

The home of drive maintenance is Disk Utility, in /Applications/Utilities. Select your drive in the panel on the left; you'll notice it has two icons, one for the hard disk itself, another for the 'logical partition' containing your data (named Macintosh HD by default).

Select either, then go to the First Aid tab and click Verify Disk. This checks the data structure; any errors it finds can usually be fixed by clicking Repair Disk.

However, if this is your main hard disk, you can't repair it while the Mac OS is running off it, so you'll need to restart with your OS DVD, holding the C key to boot from it.

Having repaired your hard disk, restart while holding down the left mouse-button to eject the DVD and restart.

If the repair fails, you'll be asked if you want to erase the disk; obviously you don't, and your next stop should be an engineer. First copy any vital files onto an external drive, and avoid writing new files to the hard disk.

You should also consider visiting your browsers and heading to Settings to delete your cache and cookies. Visit Flash Player in System Preferences and delete its saved browser data too, to see if this helps.

Sunday, 15 January 2017

Flash drive won't read on Mac

Unplugging a memory drive without ejecting it can leave it in an inaccessible state.

If a flash drive is acting up, you can reformat it using Disk Utility, found in /Applications/Utilities.
When plugged in, the drive should appear on the left, even if it didn't show up in Finder. Having selected the device, you can check it in the First Aid tab and try the Repair option, but this is designed for hard disks and may not help sometimes.

More likely, you'll need to go to the Erase tab and reformat it. Choose MS-DOS (FAT), which works with both Macs and PCs, and click Erase (not Erase Free Space).

To Format the Flash on a Windows System to make it readable on Both Windows and Mac choose ExFAT. These should make your flash accessible on both platforms.

Disc Fail to Eject in Mac

There is currently a Disc in your Mac System and you want to eject it and put in another disc but you hit the eject button and nothing happens...

As simple as it sounds, try holding the button down longer. A slight delay has been added to stop you ejecting discs accidentally. You can tap the Option key to hurry it up.

Still doesn't work? Find the disc on the Desktop and drag it onto the Trash icon in the Dock. Or click the Eject icon besides the disc's name at the left of any Finder window.

Still not coming out? Launch Terminal, found in /Applications/Utilities, type drutil tray open and press Return. That should do the magic.

Nothing still? The final option is to restart your Mac while holding down the left mouse-button.

External disk and memory drives can also fail to eject, usually because software is refusing to let go of them. Close the likely culprits: for example, iPhoto.

Application failed to Respond on Mac

When an application suddenly stops or fails to works properly, a common cause is corrupted preferences. Each application has its own preference files containing configuration data, and because they're read and written to so often these are rather susceptible to corruption.

Mac OS X may offer to reset its preferences. You can also do this manually.
Preference files, identified by the extension .plist, are stored in /Library/Preferences (on your main hard disk) and in /user/Library/Preferences, where user is your user account's home folder.

Having quit the application, make a folder on the Desktop called "Temp pref" and move all the app's preference files into this. Now relaunch the app. This forces it to rebuild its .plist file, which should solve the problem.

If it doesn't, just put the plists back. Some apps also have self-repair functions; for example, holding the Option key while launching may bring up a settings box.

Otherwise, you'll have to reinstall the application from its DVD or disc image file (.dmg).

Friday, 13 January 2017

Rescue your files in Mac

If something goes wrong with your Mac, copy off as much data as you can before anything else happens.

This may be possible even when you can't access Finder, using FireWire Target Disk mode.

You will have to borrow a friends mac system for a couple of minutes. So you can retrieve your files via his computer.

Turn off the problem Mac, leaving the other running. Unplug any FireWire peripherals and connect a FireWire cable between the two (use one with a 6-pin connector, not the 4-pin video camera plug).
Start up your problem Mac, holding down T. This is the target Mac, while the other is the host. The target should appear as an icon on the host's Desktop, and you can drag files off it onto the working Mac.

As simple as that. Voila!

Resolve Mac won't start

A total lack of response to the power button could mean a blown fuse in the plug, so check first. If it's not completely dead, the Mac will do a 'power-on self-test' (POST) as it boots up, and beep if it finds a fault. The power LED may flash too.

One, two or three beeps points the finger at RAM modules (see here for more info). Try easing them into place, in case they've become unseated. Your manual will tell you how to get at the RAM, or go to www.apple.com/support and search for 'install memory' and your Mac's model name.

Four and five beeps indicate problems with the system ROM or processor, while the Air also has an 'SOS' code consisting of three short, three long and then three short beeps. If you hear these, seek professional Mac help.

Resolve Documents open with the wrong app in Mac

Although hardly a catastrophe, this can be an ongoing source of vexation. Yet it's easy to fix once you know how. For example, when you download a JPEG file, double-clicking it will normally open Preview.

But if you habitually use Photoshop to work with photos, Preview may be irrelevant.
To change this, select any JPEG and press Cmd+I (Get Info). Under Open with, select your preferred app, such as Photoshop, and click Change All. Confirm this and all JPEGs will always open in Photoshop.

How to Resolve Slow Safari on Mac System

A solution to a slow or crawling Safari is to choose to Reset Safari from its menu and reset everything. If there's a regular delay before pages load, perhaps Safari isn't looking for them efficiently.

Go to the Network pane of System Preferences, click your internet connection (Ethernet or AirPort), then Advanced, and go to the DNS tab. Under DNS Servers, you'll see nothing or the IP address of your router, greyed out.

This leaves Mac OS X to find a default DNS (domain name server) that translates the web addresses you type into the actual IP addresses where sites are hosted. Pointing it to a specific DNS could speed things up.

Choose OpenDNS. Click + and enter 208.67.222.222, repeat and enter 208.67.220.220. See www.opendns.com/start/computer for more details.

How to take Ownership of your Files in Windows 7

If your are replacing or changing system files in Windows 7 and Vista then first you have to take ownership of the file and then grant your username full control of the file. Taking ownership of system files or folders in Windows 7 or Vista is not a simple task. Whether you use the GUI or the command line, it takes far too many steps.
Taking ownership of a file is very essential when you want to replace or edit system folders or files. Though there are many ways to take ownership of files, running a simple registry script is the easiest one.

In this method, we will merge a registry file with Windows Registry to get an option named “Take Ownership” in the Right-click menu. This is the simplest and quick method.

  1. Download the TakeOwnership.zip file from here.
  2. Extract the RAR file to the Desktop or any folder to get a file named “Ownership.reg”. Note that if you want to see the extension “.reg” you need to enable it in “Folder Options” but it’s not necessary.
  3. Right-click on Ownership.reg file and select Merge option.
  4. Click “Yes” for the User Account Prompt (UAC) and then again click “Yes” for the Registry Editor pop up and then click “OK” when you get the successful message.
  5. Now, you will see a new option named Take Ownership when you right-click on a file or folder.
  6. Right-click on folder/file for which you want to take ownership and select Take Ownership option to take ownership of the file or folder.

Application is frozen

Sometimes an application may become stuck, or frozen. When this happens, you won't be able to close the window or click any buttons within the application.

  1. Force quit the application. On a PC, you can press (and hold) Ctrl+Alt+Delete (the Control, Alt, and Delete keys) on your keyboard to open the Task Manager. On a Mac, press and hold Command+Option+Esc. You can then select the unresponsive application and click End task (or Force Quit on a Mac) to close it.
  2. Restart the computer. If you are unable to force quit an application, restarting your computer will close all open apps.

Windows won't start

First Step is to Press F8 at startup to try System Repair or choose last Known good configuration.

If you find Windows won't load, pop your Windows installation disc into the drive and restart your computer. Then select to boot from CD when prompted. Pick your language, click Next, and then choose "Repair your computer".

Windows will attempt to detect your installation – if it's successful, click "Startup Repair" to enable Windows to try and fix the problem. The repair isn't always successful the first time, so if Windows still won't load try the process again to see if it can now resolve your issue.

Delete wireless network

If you need to delete existing settings for your Wi-Fi network, what do you do?

In Vista and Windows 7 you should open the Network and Sharing Center and click "Manage wireless networks", then select an entry and click Remove.

If you're running XP and using Windows to manage your wireless networks click "Change the order of preferred networks" to remove unwanted networks.

System Restore not working

Version: XP, Vista, 7


If you're having problems restoring your computer to an earlier state, try booting into Safe Mode (tap [F8] as your PC restarts) and running System Restore from there.


In Vista and Windows 7 there's also another option: you can also run the tool directly from your Windows disc if you can't access Windows.

How To Install Windows 7 on Virtual PC

Requirements:

1. Windows 7 DVD or .ISO Image

2. Microsoft Virtual PC (free)

Procedure:

1. Download and install Virtual PC from here.

2. Run the Virtual PC software. To do this, type Virtual PC in Start menu search box and hit enter.

3. Click on “New” option and click “Next” to continue.

4. Select “Create a virtual machine” option from the available three options. Click “Next”.

5. Here, type a name for the new virtual machine. The file is automatically saved to the My Virtual Machines folder. To save it to a different location, use the “Browse” button.

6. Select the operating system that you would like to install using Virtual PC from the drop down box.

7. Use the “Recommended RAM”. If you have chosen “Adjusting the RAM” then, select the amount of RAM you would like to allocate to run Virtual machine (Windows 7) and click “Next”. (By default, it will use 512 MB of RAM, if you like to keep as it is, lick “Next”).

8. In the next screen, select “A new virtual hard disk” and once again “click” Next button.

9. In this step, browse the location where you want to create a virtual hard disk and specify a name for the virtual hard drive. or Leave it default Location with the default name Also don’t forget to specify the size of the Virtual Hard Drive. I prefer at least 16GB (Recommended by Microsoft).

10. Click finish button.

How to create your system Image in WIndows 7

To create an Image in Windows 7

1. Click on Start then search for Back up & Restore.

2. Then click on the Create a system image link.

3. Choose where you want to save the image. You can choose an additional drive, burn to multiple DVD’s (not recommended, you will burn too many discs), or store it on a network location. In this Video Tutorial I chose a partition.

4. If you have multiple drives you can include other drives if you want, but remember that will increase the size of the image.

5. At the confirmation screen you will be able to see the drives that you are backing up and the size of them. If something doesn’t look right you can still go back from this point to make adjustments.

6. A progress meter is displayed while the images is created.

7. Once the image is created you will get the option to create a system repair disc, Create the repair disk and place it in a secure location. So when it comes time to restore from the image, you will be able to use the System Recovery disk to get the system back up and running.

Add "Open with Notepad" to the Right click Menu on Windows Computer

If you use Notepad very often then you want to open notepad quickly. Some files you can choose the Open With > Notepad but not all files and particularly not for files with no extension. My solution is to add a link on the right click menu “Open with Notepad” to all file types including files with no extensions.

The default method of opening unknown files forces you to go through a list of known applications and is a headache. That’s why I like to have “Open with Notepad” in the right click menu, so that I can quickly open up files without having to go through a lot of trouble.

Download the file, extract and run the install Open with Notepad file.
The folder also contact a file to remove the installation when you no longer want to see the shortcut again.

Download “Open with Notepad” registry script


How to Map a Network Dirve in Windows 7

Before you start mapping you need to make sure that the Storage you are going to map is Being shared in the Network. You can map an Additional Hard Drive, a partition, a folder, or an External Hard Drive

To Map a Folder The steps are highlighted below
  1. Create a folder on your desktop
  2. Right click on the folder and click sharing and security
  3. Under the sharing tab. check "Share this folder on the network" and also check "Allow network users to change my file" and click apply. 
  4.  Share the Storage and set the proper permissions
  5. Click Windows Start Button, Right click Computer. or if you have the shortcut to "My Computer" just right click on it.
  6. Click Map network drive.
  7. Select the Drive Letter  
  8. Type or Browse to the Server Share, Check Reconnect at Log-on Box if you want the Mapping to be persistent (remain after a reboot).  
  9. Click Finished when finished.
Same steps apply for Mapping a Drive:

How To Fix DLL "Not Found" & "Missing" Errors

NOTE: Do not download DLL files from DLL download sites in an attempt to replace your missing or corrupt DLL files.


Follow the steps below

  1. Restart your computer. It's possible that the problem that's causing the DLL error is just temporary and a restart is all you need. This is only an option if the DLL error isn't stopping your computer before Windows fully starts. If you have one of those more serious DLL issues, you'll need to forcefully restart your computer. See How to Restart Anything for help if you need it. 
  2. Restore the deleted DLL file from the Recycle Bin. You may have simply accidentally deleted the DLL file. Most DLL errors come in the "DLL Not Found" and "Missing DLL" form. The easiest possible cause of a DLL error like this is that you've deleted the DLL file without realizing it. Enter Safe Mode to do this or any of the following steps if you're unable to access Windows normally due to this DLL error. 
  3. Recover the deleted DLL file with a free file recovery program. If you suspect that you've accidentally deleted the DLL file but you've since emptied the Recycle Bin, a file recovery program can help. Recovering a DLL file with a file recovery program is a smart idea only if you're confident you've deleted the file yourself and that it was working properly before you did that. 
  4. Run a virus/malware scan of your entire system. Some "DLL is Missing" and "DLL Not Found" DLL errors are related to hostile programs that masquerade as DLL files. 
  5. Use System Restore to undo recent system changes. If you suspect that the DLL error was caused by a change you or someone else made to your registry or other system configuration then a System Restore could end the DLL error. 
  6. Reinstall the program that uses the DLL file. If a DLL error occurs when you open or use a particular program, then reinstalling the program should properly install and register the DLL file again. Don't skip this step if you can help it. Reinstalling the program that provides the DLL file is a very likely solution to any program specific DLL error. 
  7. Update drivers for any hardware that might be related to the DLL error. For example, if you're receiving a "Missing DLL" error when you use your printer, try updating your printer drivers. 
  8. Run the sfc /scannow command to replace any missing or incorrect operating system related DLL files. System File Checker (the proper name of the sfc command) will replace any damaged or missing Microsoft supplied DLL files. 
  9. Apply any available Windows Updates. Many operating system service packsand other patches can replace or update some of the hundreds of Microsoft distributed DLL files on your computer. 
  10. Perform a repair installation of Windows. If the individual DLL troubleshooting advice above is unsuccessful, a repair installation of the operating system should restore all Windows DLL files to their original working versions. 
  11. Perform a clean installation of Windows. A clean install of Windows will erase everything from the hard drive and install a fresh copy of Windows. If a repair install doesn't correct the DLL error, this should be your next course of action. All the information on your hard drive will be erased during a clean install. Make sure you've made the best attempt possible to fix the DLL error using a troubleshooting step prior to this one. 
  12. Troubleshoot for a hardware problem if any DLL errors persist. After a clean install of Windows, your DLL problem can only be hardware related.

Create a Restore Point for Windows 7

If you are on the verge of installing a new program and are not sure how it will impact on your computer. Then it is best practice to first create a restore point whereby you can revert your system to incase of failure.

The steps are as follows:

  1. Open up the Start Menu and right-click on Computer, and then select Properties.
  2. This will take you into the Control Panel. Click on the System Protection link on the left hand side.
  3. Now select the System Protection tab to get to the System Restore section.
  4. Click the Create button to create a new restore point. You’ll be prompted for a name, and you might want to give it a useful name that you’ll be able to easily identify later.
  5. Click the Create button, and then the system will create the restore point.
  6. When it’s all finished, you’ll get a message saying it’s completed successfully.
  7. Now if your computer acts up after you install the program, you can restore your computer using System Restore.

Create an ISO Image File From a Windows 7 Installation Disk

Creating a Windows 7 ISO Image:

1. Download and install Magic ISO Maker.


2. Run Magic ISO a link of magic ISO will show on the notification area right click it.

3. Select Make CD/DVD Image…


4. Choose “Source CD/DVD-ROM” where you have the Windows 7 disk located.


5. Enter output file and name it.


6. Choose ” Standard ISO image file (.ISO) ” for Output format.

7. Click “Ok” to process.


8. Once finished you’ll have an ISO of your Windows 7 installation disk.

How to Delete your unwanted Gmail Account


If you have a Gmail account that you don’t want to use anymore you can easily delete it, but remember that this process can’t be undone and all the emails in there will be lost forever.

1. First log in to your email and click on your profile photo on top right corner and click on My Account.

2. Then click on Account Preferences.

3. Scroll down and click on Delete Google account and data.

4. Then you need to enter your account password again and click on sign in. 

5. You will need to accept and then if you are done just click on Delete Account and you are done


Thursday, 12 January 2017

How to Upgrade your Computer From Windows 10 Home to Windows 10 Pro

If you’re running Windows 10 Home and want to upgrade to Windows 10 Pro, all you need to do is change the current Windows 10 Home product key to a Windows 10 Pro product key.

Obtain your Windows 10 Pro Product Key and follow the steps below.

1. Click on start or the search icon and type “about your PC” and select it from the results. This will open the settings window.


2. Here click on “Change product key or upgrade your edition of Windows” To open the activation section in the settings.

3. Here click on “Change product key”.
4. If prompted click on yes to the UAC.


5. Now enter the Windows 10 Pro product key.


6.  The system will verify the new product key, once done click on “Start Upgrade” button.

Disappearing Wi-Fi networks


Randomly disappearing Wi-Fi networks is a known problem in Windows 10, but it can be fixed. 

The first consideration is whether you’re using any VPN software – if so, this could be conflicting with Windows 10. Turn it off, and see if this fixes the issue. If so, obviously your VPN utility is the problem – make sure you’re running the latest version of the program, and if that doesn’t help, try using a different VPN.

If the issue isn’t anything to do with your VPN, there’s another solution to look at. Right click on the Start menu, and select Command Prompt (Admin), then type in: 

reg delete HKCR\CLSID\{988248f3-a1ad-49bf-9170-676cbbc36ba3} /f

Press enter, and now type in:

netcfg -v -u dni_dne

Then hit search. This should fix the issue and all available Wi-Fi networks should show up present and correct.

Save time in the Command Prompt


Typing out commands in the Command Prompt can get annoying and take a long time, especially if they’re complex. Luckily, Microsoft has updated the prompt to accept copy-and-pasted commands, making it far easier to input even long strings of text. 

To do this, simply open Command Prompt, right click on the top bar and select Properties. Then select Use legacy console, and click OK – doing so requires a relaunch. Once Command Prompt has reappeared, go to Properties again and select Enable Ctrl key shortcuts. 


Once you’ve done that, you can copy and paste by using the usual keys – Control+C to copy, and Control+V to paste.

Record your screen (windows 10)


Windows 10 comes with built-in screen recording software. To access it, open the Xbox app (type 'xbox' into the search/Cortana box next to the start button). While that's opening, go to the app you want to record and press the Windows key + G, this opens the Game Bar. A pop-up asking if you want to open the Game Bar will appear, click 'Yes'.

After doing this, the Game Bar will load, complete with options to take a screenshot and record a video clip. When you're recording a little red box will appear in the top-right corner. All recordings are saved to This PC > Videos > Captures.

Using keyboard shortcuts in widows 10

One way of getting things done quickly with the windows 10 is by using keyboard shortcuts. Windows 10 makes it easy to access important features without having to reach for the touchscreen or mouse. The windows key in combination with other keys can be used to access applications and carry out tasks. here are a few of them...

  • Windows key + A : gain access to the Action Center
  • Windows key + Left arrow: snap to the left
  • Windows key + Right arrow: snap to the right
  • Windows key + Up arrow: enlarge window to full screen
  • Windows key + Down arrow: minimize window
  • Windows key + I : access windows 10 menu 
  • Windows key + ",": hide all open windows
  • Windows key + D: show or peek at desktop
  • Windows key + L: lock PC
  • Ctrl + Alt + Tab :pull up task view
  • Alt + F4: close an active app
  • Ctrl + Shift + Esc : launch task manager
  • Shift + Delete : permanently delete a file
  • Windows key + X key: launch command prompt
  • Alt + Enter : view properties of a file

Wednesday, 11 January 2017

You can still Upgrade to Windows 10 for Free from Microsoft Accessibility Site

The free Windows 10 upgrade offer may technically be over, but not completely gone. Microsoft still provides a free Windows 10 upgrade to anyone who checks a box saying they use assistive technologies on their computer. Even though Microsoft hasn’t announced when it will end, it surely will someday.

This free upgrade works just like Windows 10’s previous upgrade offer. In fact, it seems to be the exact same upgrade tool. Upgrading gives your PC a “digital license” that allows you to install and use Windows 10 on that PC, even after the free upgrade offer ends for new upgraders.

By downloading the upgrade tool and taking advantage of the free upgrade, you’re asserting that you use assistive technologies. However, Microsoft isn’t checking if you have assistive technologies enabled before you’re allowed to upgrade. It’s more of an “honor system” kind of deal.

How to Upgrade to Windows 10 from the Accessibility Page

The free upgrade offer is simple. To get Windows 10, you’ll just have to visit the “Windows 10 free upgrade for customers who use assistive technologies” page and download the upgrade tool. Like the previous free upgrade offer, this only works if your computer is currently running Windows 7 or Windows 8.1.

click link to upgrade https://www.microsoft.com/en-us/accessibility/windows10upgrade

https://www.microsoft.com/en-us/accessibility/windows10upgrade


Click the “Upgrade Now” button and the page will download the Windows 10 Upgrade Assistant program. Run it and you’ll be prompted to agree to the license agreement before continuing.
This seems to be the same free upgrade tool that was made available to the general public as part of the earlier free upgrade offer. Click through the wizard and it will check that your hardware is compatible before automatically downloading and upgrading to Windows 10.
Once the upgrade is complete, your PC will be running Windows 10 and will have a “digital license” that lets you reinstall Windows 10 at any point in the future.


If you upgrade to Windows 10 and decide that you’d like to downgrade later, you can roll back to Windows 7 or 8.1 at any time within the first 30 days. Your PC will still have a digital license, so you can upgrade that computer at any point in the future–even after this free upgrade offer ends.

Tuesday, 10 January 2017

Livestream Video to Facebook directly from publishing tools

Overview

People love watching video on Facebook. The Live Video publishing tool for Pages lets you use your existing video software or hardware to create professional looking live video content for your followers.

Setup and Preview

1. First, login to your Facebook Page and select Publishing Tools in the top navigation bar.

2. On the left menu, click on the Video Library option under the Videos section.


3. Click on the + Live button to begin configuring your Live post.

4. Depending on the requirements of your encoding software you will use one of the following options:


  • Single Field: Your encoding software requires only a server address or url.
  • Separate Field: Your encoding software requires both a server address and key.
  • Be sure to enable a secure connection if your encoding software supports rtmps.


    Important: The Server URL and Stream Key can only be used for a single Live preview/post connection. You must use the same URL and key to preview and post. That is, you cannot preview, stop the stream, and then resume at a later time. The URL and Key are valid for 7 days. Once you preview the video, you have up to 5 hours to go live. If you need more time, create a new stream key closer to the event time.

    5. Copy and paste the Server URL and key to your encoding software. Each encoding software has its own configuration. In most caes, you will need to find and edit stream settings and configure a Custom Streaming Server or RTMP Server as the type and enter the copied server URL and/or stream key. Review your encoders help documentation for more information on configuring a custom rtmp stream.

    6. Press the Preview button to configure the Live Post and to preview the encoder stream output. If you have already started the video stream from your encoder it may take anywhere from 1-10 seconds for the video stream to appear within the preview area.
    The Go Live button remains disabled until a valid stream from the encoding software is detected. If you receive a Stream is offline message, make sure you have started streaming from your encoding software. If you still have issues, check the server url and/or stream key were copied correctly. You can reference the server url and key anytime in the tab.

    7. Add the Video Title and Video Topics Tags on the Basics tab and use the icons in the footer menu to tag, add feelings, specify a location and set a preferred audience (see more about audience restrictions below).


    8. Add Audience Restrictions: If your need to restrict who sees your broadcast (for example, your broadcast rights only apply to certain countries), you can use Audience Restrictions.


    Like Posts, you can restrict your audience by age, gender and/or location.


    9. Add branded content handshake:


  • If your video includes a third party brand or product, you must tag the Page using the Branded Content handshake.


  • 10. The advanced tab contains:

  • Options to choose where you want the video to appear, including the ability to prohibit embedding, unpublish the video aft the live video ends, and the option to include a warning about graphic content.
  • The ability to pull a player embed code (in the upper right option menu).
  • The option to create a continuous live stream. A continuous live stream supports a stream of unlimited duration. Use cases for continuous live include live feeds of aquariums, museums, and zoos. (Before streaming using continuous live, please note that continuous live streams do not generate VOD, do not send notifications to followers, and do not collect video insights for peak concurrent viewers.).
  • The option to create a live reference stream for Rights Manager.
  •  
  • Go Live or Schedule Live Post

    Press the Go Live button to immediately begin the Live post. Once Live, you will see the red Live indicator appear on the video player.
    Broadcasters can also Schedule Live posts by clicking the drop down in the "Go Live" button.


    Scheduling a live video makes it easier to build anticipation and buzz with your audience before your broadcast begins, so you can start strong with an audience already assembled.
    When you schedule a live video, an announcement post will be published to News Feed letting your fans on Facebook know that the broadcast is coming. People who see the post can opt in to receive a one-time reminder notification that will alert them shortly before your broadcast begins. Your fans can then join a pre-broadcast lobby directly before the live video starts, where they can connect and interact with other viewers.

    You can schedule a live broadcast up to one week in advance, and people can join your lobby three minutes before your broadcast begins. Once you’ve scheduled a live video, you will be able to share a link to the broadcast or embed it in other places, such as websites or blogs.

    While the video is live you can monitor a few key Live metrics in the Video Performance section:


  • Live Viewers: number of unique viewers actively watching the Live video post.
  • Total Views: A running count of the total number of views received throughout the Live video post including those that are not currently watching.
  • Press the View Post button to navigate directly to the Live post on your page.
    Press the Finish Live Video button to end the post. Please note, to avoid accidentally ending a Live Post,you must also confirm by pressing the End button in the message box.

    Live Videos in the Video Library

    Once your Live Video post is finished, the video will automatically begin transcoding into a normal static video and will appear in the Video Library. You can find live, and previously live, videos quickly using the Live options under advanced filters.

    Live Video Specs

    Video Format


  • We accept video in maximum 720p (1280 x 720) resolution, at 30 frames per second. (or 1 key frame every 2 seconds).
  • You must send an I-frame (keyframe) at least once every two seconds throughout the stream..
  • Recommended max bit rate is 4000 Kbps.
  • Titles must be less than 255 characters otherwise the stream will fail.
  • The Live API accepts H264 encoded video and AAC encoded audio only.

  • Video Length


  • 240 minute maximum length, with the exception of continuous live (see above).
  • 240 minute maximum length for preview streams (either through Live dialog or publisher tools). After 240 minutes, a new stream key must be generated.

  • Advanced Settings


  • Pixel Aspect Ratio: Square.
  • Frame Types: Progressive Scan.
  • Audio Sample Rate: 44.1 KHz.
  • Audio Bitrate: 128 Kbps stereo.
  • Bitrate Encoding: CBR.
  • Troubleshooting

    Error messages:


  • Once the live broadcast is started and events are logged for the broadcast, an "Event Log" button will appear.
  • The Live Video Event Log defaults to show Error events, but the user can toggle the filters to include warnings and other events.
  • Still unable to connect?


  • Make sure you have a reliable internet connection.
  • Disable all ad blocking software or browser plugins that could prevent the video player from loading.
  • Check your firewall settings and ensure rtmp is allowed.
  • If the Server URL and Key are older than 24 hours they are no longer valid. Create a new URL and Key.

  • cc: facebook help center